Yesterday was a very fun day! Except that it was extremely hot. It's still in the 100's here in the Valley of the Sun. Ugh!!! I
really hate hot weather. Why do I live in Phoenix???
In the morning Sara had her first soccer game of the season. She's a
great athlete. Sara is one of the youngest on the team and one of only two girls, but she was right in there in the thick of it, keeping pace with those older boys. I don't know where she gets her speed and agility from! Certainly wasn't me or her dad. Although she didn't kick any goals herself, she was responsible for getting the ball down the field on her own a couple times in order for someone else to kick the goals. Her team won 5-1!
G O
K N
I G
H T
S !
! ! Here is a pic of her before her game.
After that we came home and rested for a bit (necessity for mommy). Sara and I have been planning a "Girl's Day" for a couple of weeks, but since I don't have any a/c in my car, I was not going to go out in the heat of the day. So we waited until about 4:00 to continue our day. Friday night Sara got her eyes checked. She has been complaining about not being able to see the board at school and stuff, so it was time to take her in. Yep. She needs glasses. It was a painstaking process, but she picked out a pair of frames that she liked. So we went and picked them up the finished pair. She was soooo excited! The ones she picked are kind of a wine color with wider ear pieces that have swirlie-whirlies on them. Sara says they remind her of the sun and waves. Here she is with her new specs...


She's very happy with them. And the whole way home she was reading all the street signs that she couldn't see before. lol I remember when I got glasses how exciting it was...I could actually see the leaves on the trees instead of a big green blob! So I know where her excitement was coming from.
Then we went to the Tempe Market Place. It's a great big outdoor mall. We found a little place called "As You Wish" and decided that's where Sara is going to have her birthday party. It's a place where you can buy all kinds of pottery pieces in just about any size, style, shape...animals, trinket boxes, magnets, plates, tiles, mugs...and then you sit down and paint them. When you paint them, the paint looks very light, dull and flat. BUT then you leave them there and they fire them. When you go back in a few days to pick them up, they are bright and shiny and beautiful! Doesn't that sound like a lot of fun for some 9 year old girls? Along with her birthday party she'll get a big birthday plate that she can paint and all the girls will sign that she will be able to keep. It is pricey, but I think it will be a lot of fun for her!
After that we went to Claire's Boutique and she was in girly heaven. She found lots of treasures, and I had to keep reminding her of our budget. She kept putting one thing back and picking up something else. She finally got it all figured out, though, and it was like a mini birthday. lol
Then we went to Michael's. I've been thinking that since I've been having such a hard time with my hands because of the carpal tunnel with the bead embroidery and stitching, maybe I would try something new with beading. I've been thinking about doing work with wire. I'm pretty clueless when it comes to that. I did watch a few YouTube videos on some different things, and I think I can do that! Isn't YouTube great? Love it. Anyways, here's what I got:
A crimper tool. The package says that it's designed to crimp #1 and #2 crimp beads and #2 crimp tubes. I don't know what that means.
This set comes with: bent nose pliers, flat nose pliers, long nose pliers, round nose pliers, side cutter, and a micrometer, whatever that is. Oh, something about measuring beads and stones. hmm. I know I need the round nose pliers and the cutter, but what about everything else? The set was on sale for like $8, so I thought it looked like a good deal.
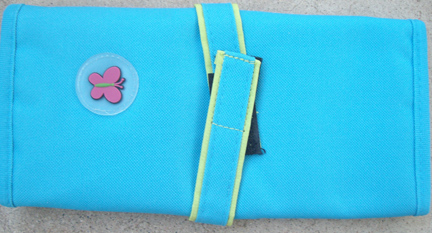
Then I got this cute tool bag for $5. Seemed like something I should have. Do any of you out there do much with wire work? What do you think about the tools I got? Did I get what I need to get started? Do I need something that's not here? I think I'm going to have to find a book at the library or something, because I don't know anything about wire gauges and all that kind of thing. Maybe I can find some info on the 'net somewhere.
After Michael's we started having a terrible dust storm and Sara was getting nervous. She thought it best that we head home. Ok, I said, but not before we end the trip with a chocolate shake! mmm yum mama loves her chocolate. And in the car she looked up at me and said, "Mommy, this was the best day
ever!" Who could ask for more than that?